
How to build a deep water culture system is one of the most must-have skills that hydroponics gardeners should master.
Deep water culture system or DWC is among the basic types of hydroponics systems used by people who do gardening for business or pleasure. DWC is very efficient and effective in growing crops in water. Gardeners like this method because it is not only simple but also cost-friendly to create. From the different materials that can be used, you can think of many creative ways to make your own water culture system. Here are the steps on how to build a deep water culture system.

You can grow lettuce faster in DWC than in soil.
Advantages Of Using Deep Water Culture (DWC)
There are many reasons why gardeners opt for DWC systems. The main reason they like this particular hydroponic method is that the steps on how to build a deep water culture system can be easily followed.
Here are the advantages of having a DWC system in your garden.

One of the crucial steps on how to build a DWC system is to get the right tools and supplies for the system.
Materials And Supplies Needed For Making Your Own DWC
Materials:
Supplies:
Steps On How To Build A Deep Water Culture System
Step 1: Assemble Your Bucket.
You need a power drill to prepare your bucket. First, you make a hole that can fit your air tubing on the top of your bucket. The distance between the top of your bucket and the hole is around 1 inch.
Materials Needed:
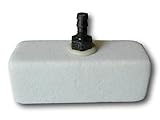
Step 2: Get The Air Stone.

Air tubings are vital if you want to learn how to build a deep water culture system.
In this step, you need to cut two pieces of your air tubing with a measurement of 18 inches. Connect one of these pieces to the air stone. Place this stone in the 5-gallon bucket you prepared in step 1. The surface of the stone must face upwards. You ought to remember to have enough air tubing in order for the air stone to rest at the bottom of your bucket.
Materials Needed:

- Increase oxygen levels, lower CO2 and raise PH.
- It is an important instrument to successfully keep aquatic fish for respiration process.
- It produces fine bubbles making it efficient in the replacement of Oxygen in fish ponds, tanks or hydroponic systems.
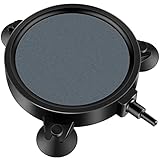
- Medium Bubbles: The air bubblers produce abundant dense bubbles to aerate your water reservoirs. A great way to increase...
- Model: ASD100; Jetting volume: 12 L/min; Recommended air pump power: > 4 W; Inner diameter of tubing: 3/16" or 3/8"....
- Reliable Material: The aquarium air stones are made of mineral material and sintered at a high temperature, it causes no...

- Medium Bubbles: The air stone produces abundant dense bubbles to aerate your water reservoirs. A great way to increase...
- Model: ASR-100; Jetting volume: 15 L/min; Recommended air pump power: > 4 W; Standard ID airline tubing: 3/16" or 3/8"....
- Reliable Material: The air bubblers are made of mineral material and sintered at a high temperature, it causes no effect...
- Medium Bubbles: The air bubblers produce abundant dense bubbles to aerate your water reservoirs. A great way to increase...
- Model: ASD100; Jetting volume: 12 L/min; Recommended air pump power: > 4 W; Inner diameter of tubing: 3/16" or 3/8"....
- Reliable Material: The aquarium air stones are made of mineral material and sintered at a high temperature, it causes no...
Step 3: Connect Your Air Pump.

A check valve can help maintain your air pump.
You need to link the end of air tubing that is not attached to the top of the 5-gallon bucket. Then, connect the open end of this tubing to the check valve. After setting the first piece of air tubing up, you can now fasten the second piece of air tubing that you cut in step 2.
Attach the second piece to the other end of the check valve and to your air pump. Check if there are bubbles that appear from the air stone. An additional tip is not to attach the check valve inside your bucket.
Materials Needed:
No products found.
Step 4: Do The Needed Preparations For Your 5-Gallon Bucket.
Fill your net basket with the hydroponics nutrient solution and connect it to your bucket. The 5-gallon bucket must be filled a half inch above the bottom part of your basket. It is recommended to lessen the level of the solution around a quarter or a half below the bottom part of your basket when you see roots growing a few inches below your basket.
Materials Needed:
Step 5: Start Planting Your Seeds And Cuttings.

Clay pebbles can help the roots in providing ample amount of nutrients to your plants.
One of the main steps on how to build a deep water culture system is planting the seeds or cuttings. You can place these in a net cup. For the rockwool starter cubes and roots, you cover them with clay pebbles. A seed is placed in a rockwool starter cube before covering with clay pebbles.
Materials Needed:
- check
- check
Step 6: Do Modifications (Optional).
The procedure on how to build a deep water culture system can be personalized. There are modifications that you can do. Here are some ideas you can apply to your DWC system.
Conclusion
DWC is an effective way of gardening in aerated water. Most gardeners think of this as the purest method of hydroponics.
If it is your first time to explore the concept of hydroponics, trying DWC is worth a try. It is less expensive as compared to other hydroponics options. Moreover, the procedure on how to build a deep water culture system is simple, so beginners will not have a hard time setting it up. You just have to make sure that there is enough oxygen in the water, and the water has the right temperature. By doing this, the root of the plants will develop which will result in a phenomenal growth rate of your crops.
Pin it!

Last update on 2024-04-27 at 17:36 / Affiliate links / Images from Amazon Product Advertising API